Saw Blade Inspection After Sawstop Cartridge Activation
Can I Continue to Use My Sawblade?
SawStop table saws may best be known for the design of an ingenious brake that engages in the event of accidental contact with a finger. This technology has saved the fingers of many a woodworker, but what of the saw blade which went from high-speed to a full stop when the activation and engagement occurred?
Ridge Carbide team members take calls each week that go something like, “…my finger is intact, but I am worried about my sawblade!”
Guiding callers through the evaluation process is important to us because, no matter what blade they’re using, we don’t want you to run the risk of using a compromised blade. These are the best practices we follow as a blade manufacturing expert. SawStop and the manufacturer of your specific blade will also have recommendations. We also want to be sure you follow SawStop’s instructions for cartridge removal, replacement and set up. With that in mind, let’s get to the process.
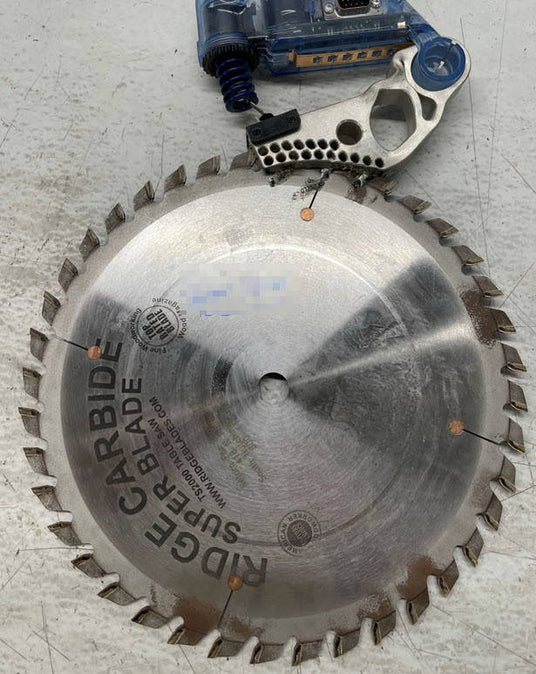
SawStop’s brake system utilizes a specially machined aluminum cartridge that quickly “engages” the saw blade’s teeth to stop rotation. This is what saves your fingers! It also “mates” the cartridge to the sawblade which can make cartridge removal challenging.
Step 1 - Remove the Cartridge
- Before removing the cartridge, use a marker or masking tape to indicate the teeth that were engaged in the aluminum block.
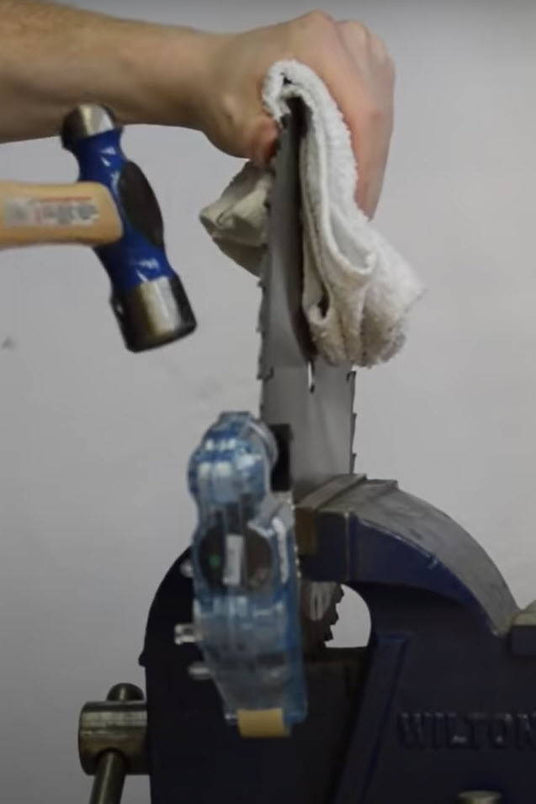
- Place the saw blade in a bench vise with teeth pointing to the right.
- Clamp in place with the cartridge at the 3 o’clock. (See Figure 1)
- Place cardboard at the 6 o’clock position between the vise casting and the saw blade teeth. This will prevent damage to the carbide tips.
Use a hammer (conventional or deadblow) to tap on the cartridge in a clockwise direction. Alternate hammer strikes on each side of the blade. Several strikes of increasing force may be required to free the cartridge.
Step 2 - Inspect the Saw Blade’s Carbide Tips for Damage
You may be as surprised as we are that a saw blade can be stopped so quickly and NOT have the imbedded teeth damaged. That is the case about 50 percent of the time, in our experience.
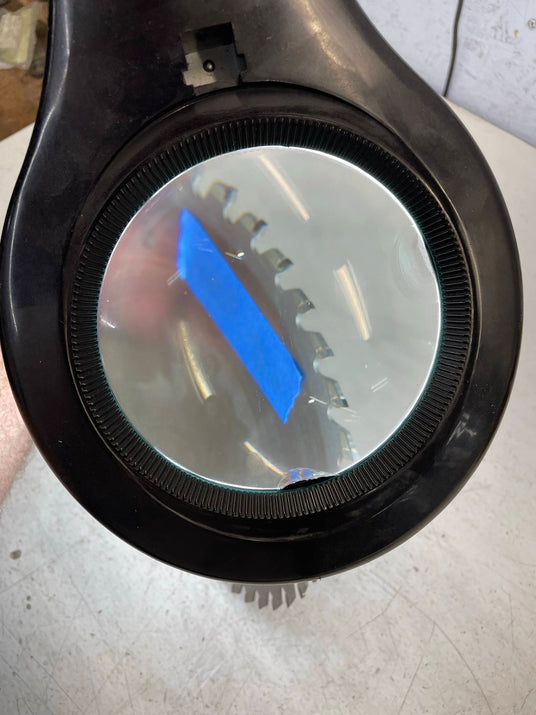
To inspect all the teeth that met the cartridge (this is why you marked them with the tape or a marker) use a magnifying glass (See Figure 2) and check for the following:
- Chipped, cracked or broken carbide tips
- Tip separation along the brazing line at the intersection of the carbide tip and the sawplate
The Top Grind on the saw blade can affect the chance of carbide tip damage. A saw blade with a high ATB is more fragile than a Triple Chip Grind and so it’s more prone to engagement damage. Click here to learn more about Top Grinds.
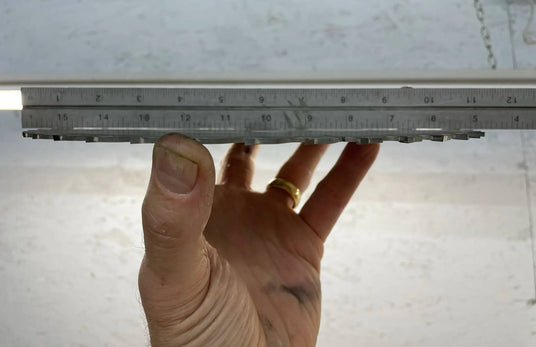
Step 3 - Ensure the Saw Blade’s Steel Plate is Flat
A quality cut is only achieved with a flat plate. When a SawStop engages, the force is in a single plane, which happens to be the sawplate. The force may bend or deflect the sawplate. A Thin Kerf saw blade has a higher chance of bending than a Full Kerf (1/8”) sawplate.
To check flatness, follow these steps:
- Lay a steel rule (at least as long as the saw blade’s diameter) on edge across the plate.
- Make sure one end of the rule is within the area that was engaged.
- Hold the plate in one hand and the rule in the other.
- Position the plate in front of a light source so you can see light between the plate and the ruler.
- Turn the plate over and repeat. (See Figure 3)
- Rotate the plate 90 degrees to a
position perpendicular to the engagement and check again using the ruler
on both sides of the blade. - As you go through the process, use a marker to indicate the extent of any bend you observe.

